I found this (http://www.jmedved.com/2009/11/visual-studio-2008-and-team-foundation-server-2010/) article to be very helpful in a project I am working on at the moment:
Team Foundation Server 2010 works great when combined with Visual Studio 2010. However, if you wish to combine it with Visual Studio 2008, some additional setup is required.
First thing that you need to install is Team Explorer 2008 (http://www.microsoft.com/downloadS/details.aspx?familyid=0ED12659-3D41-4420-BBB0-A46E51BFCA86&displaylang=en). If you already used source control, you may have it. Easiest way to check is to go into Tools > Options and select Source Control. If there is “Visual Studio Team Foundation Server” in plug-in list, you can skip this download.
Another thing I installed was Visual Studio Team System 2008 Service Pack 1 Forward Compatibility Update for Team Foundation Server 2010 (http://www.microsoft.com/downloads/details.aspx?FamilyID=cf13ea45-d17b-4edc-8e6c-6c5b208ec54d&displaylang=en). I do not think that this long-named update is really “must” but I decided to install it anyhow – just in case.
Once you install everything, you can try adding Team Foundation Server 2010 as destination, but you will be greeted with error “TF31002: Unable to connect to this Team Foundation Server …”. Reason behind this is that old Team Explorer 2008 does not know anything about collections.
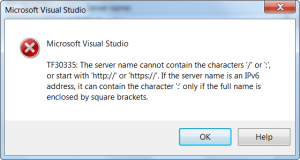
Solution would be to add it as full path (e.g “http://server:8080/tfs/collection”). I could not do it because every time I entered full path, I also got error “TF30335: The server name cannot contain characters ‘/’ or ‘:’ …”. Since official way would not work it was time to come up with alternative.
In order to add TFS 2010 server, you will need to exit Visual Studio 2008 and go into Registry editor. Find key “HKEY_CURRENT_USER\Software\Microsoft\VisualStudio\9.0\TeamFoundation\Servers” and at this location just add string value. Name of this value will be what Team Explorer 2008 will use for display. It’s value is full address of your server. It should be something like “http://server:8080/tfs/collection”.
Now you can go into Visual Studio 2008 and Team Explorer will have new entry. As you work with it, you will notice that not everything is “bump-free” (e.g. tasks). However, source control it self will work perfectly and that was enough for me.